

Preparing to Submit
Before you log into the Perspectives Editorial Manager® System, download a copy of the Final Issue File document [.docx], complete all required fields, and save the document to your computer. Save the document as a Microsoft Word (.doc or .docx) or other standard document format. PDFs are not accepted.
You will upload a copy of the completed Final Issue File document in the last step of the submission process.
Submitting Continuing Education (CE) Files
There are two ways to enter the Editorial Manager system and submit CE files:
- Log in using your Editorial Manager credentials.
- Log in using your ORCID iD.
Logging in Using Editorial Manager Credentials
To submit CE files, log into the Perspectives Editorial Manager System. Enter your Editorial Manager username and password, and click the “Editor Login” button. See screenshot below.

Loging in Using ORCiD iD
Another option is to log into Editorial Manager using your ORCID iD by clicking on the green ORCID “iD” symbol on the login page (see previous screenshot).
ORCID provides a unique personal identifier known as an ORCID iD that distinguishes you and your contributions. An increasing number of journals are including these unique
identifying codes to help authors get credit for their work. For more information, see Getting Started With ORCID.
In the top right navigation bar, select “PDM/CE Manager Editor” from the Role dropdown menu (see red box numbered “1” in the screenshot below). After selecting the role, select the “Submit a Manuscript” option in the top left navigation bar (see box numbered “2” in the screenshot below).

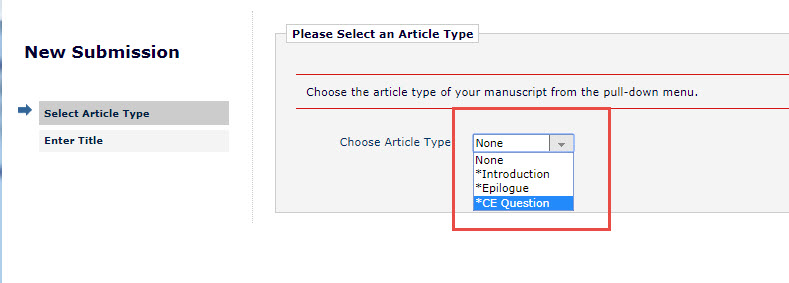
Selecting The Article Type
On the New Submission screen, go to “Select Article Type” and then select “CE Question” as the article type from the dropdown menu (see red box in the screenshot below).
Entering the Title
On this screen, you will enter both the full title and the short title. See instructions in the subsections below.
Full Title
Click on the “Enter Title” section of the New Submission screen. Copy the title from your complete Final Issue File document, and enter it into the “Full Title” field.
Short Title
Copy and paste the full title into the “Short Title” field.
Note: If the full title exceeds 50 characters, please reduce it to 50 characters or fewer for the short title.
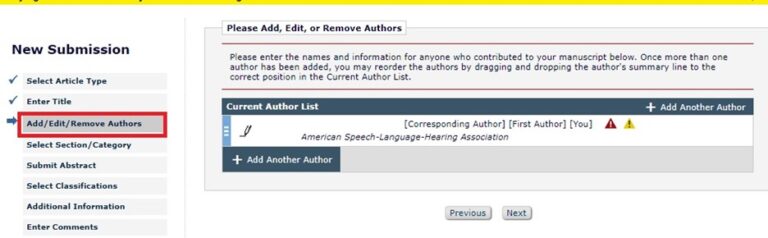
Adding Authors
In the “Add/Edit/Remove Authors” section, please confirm your information as author. You are the author of the CE activity. If you worked with someone to compile or edit the activity, you can also add them as an author.
Note: Do not include the authors of the individual articles here. This field asks for the author of the activity, not the author of the article itself.
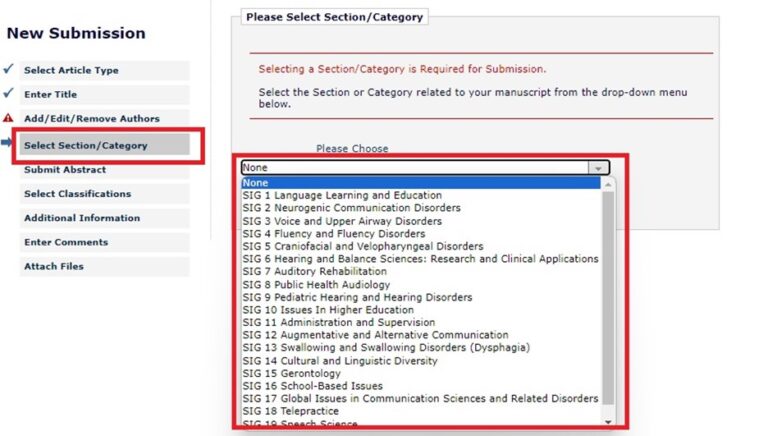
Selecting a SIG
In the “Select Section/Category” section, choose the SIG for which you are submitting the activity (see red box in the screenshot below).
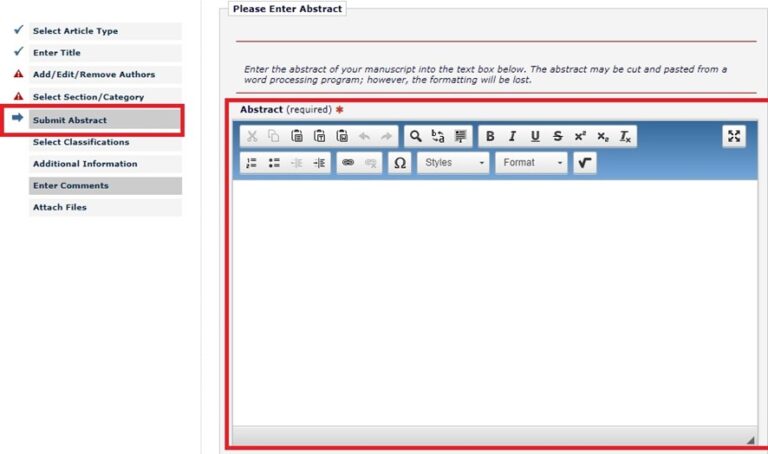
Submitting the Abstract
In the “Submit Abstract” section, enter the text from the “Regular Description” in your complete Final Issue File document into the “Abstract” field (see red box in screenshot below).
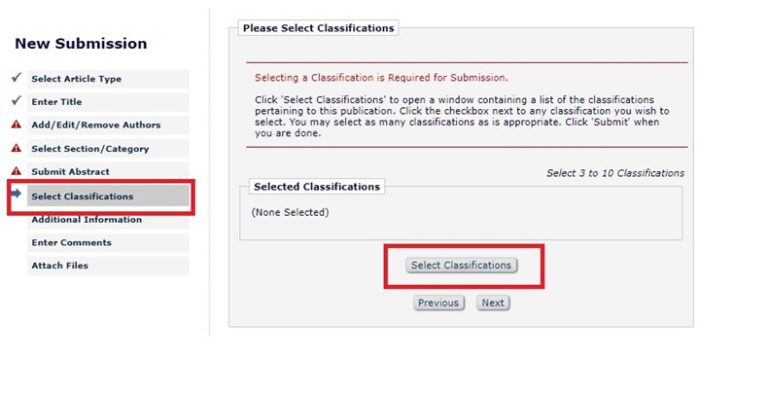
Selecting Classifications
Classifications act like tags; they help readers find and choose the activity.
In the “Select Classifications” section, choose one to five relevant classifications from the choices provided. Click the “Select Classifications” button (see red box in screenshot below) to open the classifications list and make your choices.
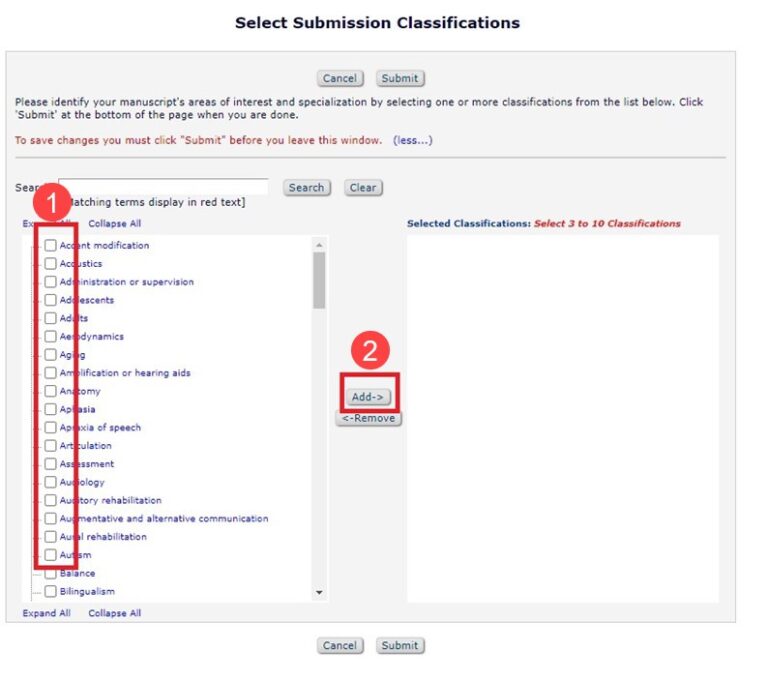
Click the checkbox next to a word (see red box numbered “1” in the screenshot below), then click “Add” to move the classification to the “Selected Classifications” box (see red box numbered “2” in the screenshot below).
You can also remove classifications from the “Selected Classifications” box by clicking the checkbox for the term and selecting “Remove.”
After you have made your selections, click “Submit.”
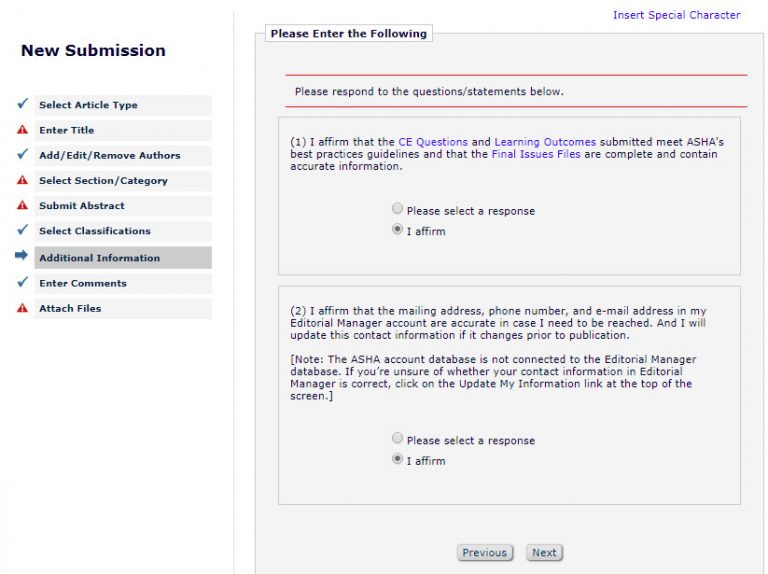
Providing Additional Information
On the next screen, you will be asked two questions (see screenshot below).
The first question asks you to affirm that (a) the submitted CE questions and learning outcomes meet ASHA’s best practices guidelines and (b) the Final Issue File is complete and contains accurate information.
The second question asks you to affirm that your contact information in your Editorial Manager account is accurate and that you will keep it up to date.
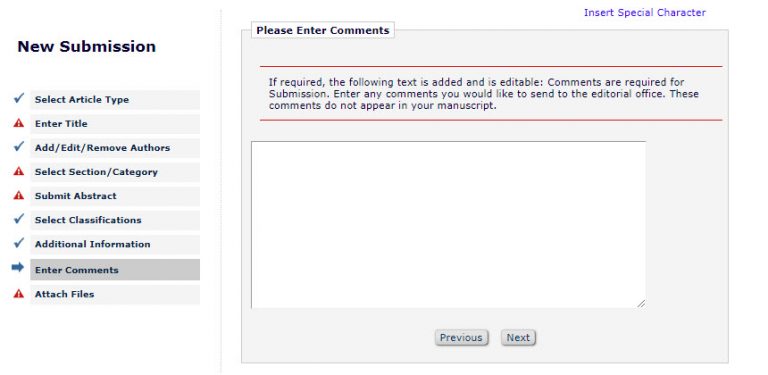
Enter Comments
If you have any additional comments, enter them into the text box provided (see screenshot below).
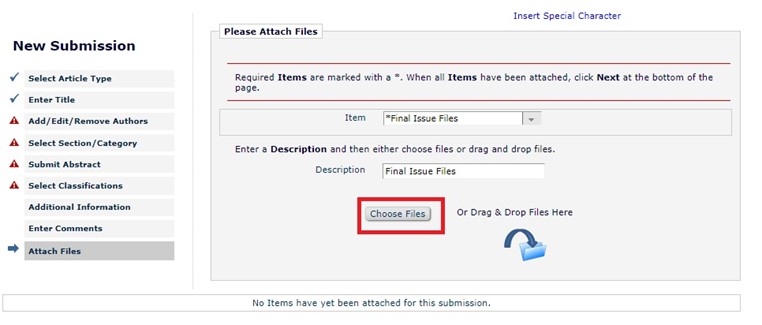
Attach Files
Go to the “Attach Files” section. In the “Item” field, select “Final Issue Files.” Next, use the “Choose Files” button to attach a copy of the completed Final Issue File document.
Important Note:
The Final Issue File may not be uploaded in a PDF format. Uploading a PDF file will require you to resubmit your documents and may cause significant delay. Please upload all CE files as a standard document format, such as Microsoft Word (i.e., .doc or .docx).
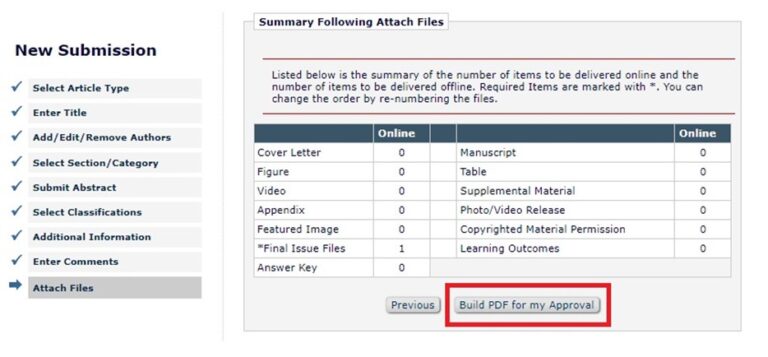
When you have finished uploading your files, review the provided summary of included files. Please ensure that “Final Issue Files” has a number greater than zero next to it. Once you’ve verified that all the files are there, select the “Build PDF for my Approval” button (see red box in screenshot below).
Building the PDF and Completing the Submission
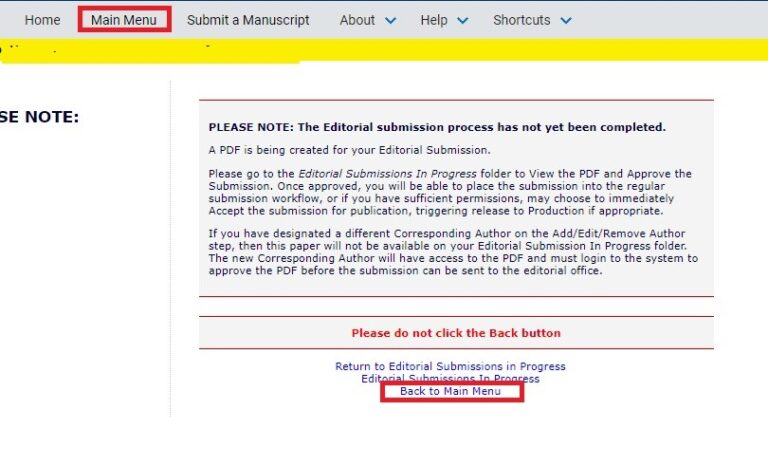
It may take several minutes for the PDF to build. Once complete, it will appear on your main menu in the “To-Do List” under “My Pending Assignments.” To return to the main menu, click the “Main Menu” button in the top menu (see red box in top left of screenshot below) or click “Back to Main Menu” at the bottom of the page (see red box at bottom center of screenshot below).
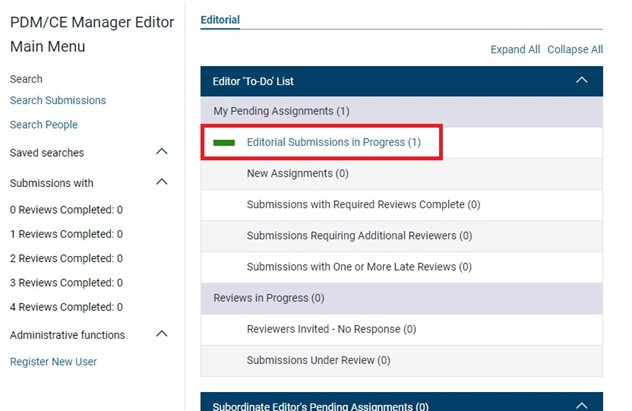
From the main menu, click on “Editorial Submission in Progress” (see red box in screenshot below).
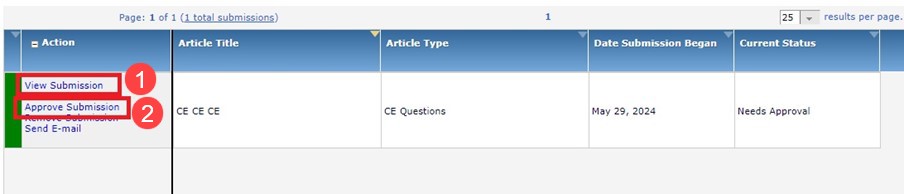
Click on “View Submission” (see red box labeled “1” in screenshot below) to view the PDF.
Check the PDF to make sure that everything rendered as expected. If you need to modify anything, click “Edit Submission.”
Once everything looks correct, click the “Approve Submission” option (see red box labeled “2” in screenshot below) to submit your CE files.
You must view and accept your submission in order to finalize the submission process.
The submission is now in the ASHA Publications queue for review.
If you have any questions, email perspectives@asha.org.